Showing posts with label Binding. Show all posts

Sunday, June 07, 2015

June ALYOF Goal

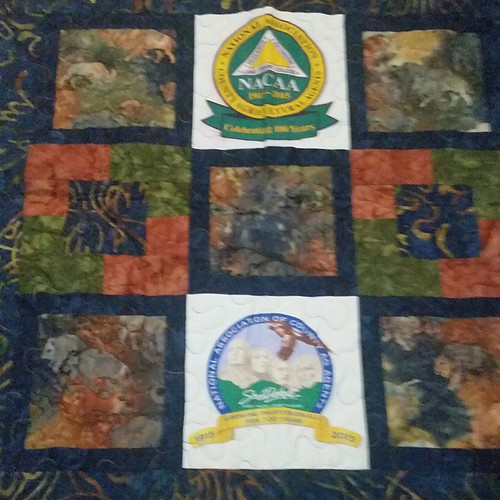
My goal for June is lofty, but very manageable, because it has to be done. I should have the King size NACAA quilt back from the quilter mid-month and my goal is to do the binding on it as well as this little wall hanging I made up with the scraps. I have the binding cut out for this one, so I'll get it put on tomorrow night and have it ready for binding during my lunches this week. The convention is in July, so I plan to have the binding done before the holiday weekend.

This month for A Lovely Year of Finishes,  I'll be binding both the wall hanging and king size NACAA quilts. #nacaa #alyof #alovelyyearoffinishes

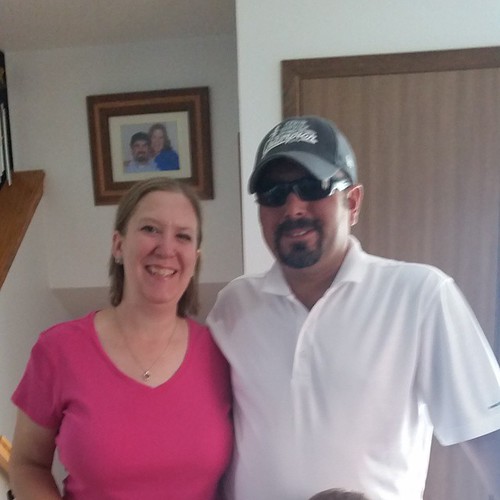
Today Paul and I celebrated our 7th wedding anniversary. Last night we went out for a fancy dinner and spent some time alone without the kids.
Celebrating our 7th anniversary tonight with a night out to Minervas.

My Button

Wednesday, October 10, 2012

WIP Wednesday Week 41 10.10.12

I am going stir crazy this week! We tore out the carpet in the extra room on Saturday, so all of my sewing stuff is packed up and in numerous places around the house. Paul is putting hardwood laminate down in the room and it's taking longer than I expected. Luckily I had most of my stuff gathered for class tonight so I didn't have to dig too much. I haven't been able to sew all week and it's driving me mad, especially since this was the last weekend I didn't have homework to do. Class started again and now I'm swamped with getting several papers done before Sunday and we're going to be out of town.
This week I am working on the binding of the Mocha Meringue quilt. I have about 1 1/2 sides done.I left it at work, thinking the floor would be done on Sat. and I'd get to sew on Sunday. I didn't get to do any sewing!  It's been cold, so we've stayed inside on breaks, so I did get a bit of handwork done on it. Still a ways to go though. I did finish the Blush quilt binding, so I feel at least a small bit got accomplished.
Mocha Meringue
Thursday night while I still had the sewing machine up I worked on block 3 of my Swoon quilt. I feel like I've gotten lots accomplished on this quilt since I made kits up for it last week. I did have to unpick a few seams and re-do a few blocks for this one, but it turned out nicely. The picture was taken with my phone and lighting isn't good, but the block is done!
Untitled
While I haven't been able to sew this week, I thought I would use the time to be productive and "scrapbook" Mikaela's first year. I use the term loosely because my friend made me like 50 pages and ALL I had to do was cut out the pictures and glue them on. My hand hurt so bad after about 25 pages and running out of glue that I quit on Sat. I nursed my sore hand all weekend and can finally use it again. I've used the last few nights on the computer to pick through my pictures and organize them by month, started writing on the backs with the dates taken, and uploaded somewhere near 400 pictures to Walgreens.com to print when they go on sale a bit cheaper. Almost 100 of those were quilt related pictures to put in my quilt journals, which I have seriously neglected the past year as well. I finally uploaded all my July-Sept. pictures to my external hard drive as well. I feel like I'm making headway, but need to get more glue and get back to work on the scrapbook. I'm really irritated with Webshots and the changes they've made, so I need to figure out how to manage my pictures better so they are still easy to blog with. 

Finished this week:

Blush Quilt

Ongoing projects:  (and progress this week on them)
Sign Language Diaper Clutch
Batik Scrappy Quilt - All the blocks and edge pieces sewn!
Hugs & Kisses Batik quilt -
Hugs & Kisses Scrappy Quilt
Swoon - Sewed 1 block and kitted 6 more.

Quilts Needing Hand sewing on Binding

Mocha Meringue Wonder Blocks- worked on binding.

Completed tops awaiting quilting:
Pink/Green Jungle Animal Baby Quilt - Need to make backing
Confetti Top - At the shop
Twisted Heart - At the shop
Merry Go Round - Needs backing made.
Autumn Star Quilt - needs backing

New Projects:

No progress:
Ed's Crown Royal Quilt - Started sashing - Need to get a move on, he's getting married
Dilly Dally Baby Girl Quilt

This week's stats:
Completed projects - 1
New projects -
Currently in progress -5
Finished this year - 55, 12 Samples

I'm linking up for WIP Wednesday at Freshly Pieced!

wipwednesdaybutton

Tuesday, September 20, 2011

Saturday Sewing

Saturday we stayed home the entire day, well almost. I cleaned out the crawl space and got rid of 2 suitcases, 3 large totes, and 2 big bags of clothes. I figure I'll never be in that size I was before, so it's time to move the stuff on! I made room to put all of mom's batting and most of her UFO's that I'm not currently working on in the crawl space until I need them. My closet was a little too overwhelming and I needed to move it around. I worked from 9-4 and really made a lot of progress. Then I read my facebook.... Jodi had been to Hancock's and gotten a small OTT lite for $10. I was intrigued, I'm the notions girl... so I quick got ready and ran to town to get one.  Jodi, you're such a bad influence!  Paul kept Mikaela at home so I got to do a bit of shopping for Mikaela too. She needed pants as none of her outfits had pants. I also found her the FP pink pig piggy bank. It'll be her Christmas present. I was so excited since she loved playing with it at Jon and Nich's.
Paul fixed supper too, so I got to spend the evening sewing to my hearts content!
I made this block for Patti for our September Friendship block swap. This block turned out awesome. Everything just seemed to match so perfectly without me trying.
Quilt 040
I put the binding on this mug rug for a co-worker who is going to get the ATTA girl award at work on Thurs.
Quilt 042
And finally I trimmed up this quilt mom made last year at the Wall Quilt retreat. She had me quilt it, had the binding with it, but never put it on. I figured since it was Fall I should finish it. I might just put it in my office for awhile.
Quilt 045

Sat. was so productive that I thought  I 'd exhausted all the time I would get to sew... but I was wrong!

Monday, October 11, 2010

A Few Finishes!

This weekend I felt like I got a lot done, but not a lot to show. Saturday night I cut the bias binding for my tree skirt that turned into a table topper instead. I just couldn't cut the hole in it, knowing it looked so good on our round dining room table. Then I worked on binding two samples for the store. I got the binding sewn on and pinned down before calling it a night.
Sunday after church and a nap, I worked on a couple bathroom bags for Paul. I was able to get both of them finished.
IMG_0018
IMG_0019
He decided he liked the largest one best and took it with him.
IMG_0020
I machine sewed the binding down on the two sample quilts, which took me several hours. I just always think binding is going to go faster than it really does. While Amazing Race and Undercover Boss were on, I did the handsewn binding for my tree skirt/table topper and got it done. It went a lot faster than I expected! I also cut out and started 10 bags for Halloween treats. I planned to give one to my niece and I bought way more fabric than I needed, so I'll have a few extras. I'm thinking my co-workers might each get a little bag of treats too. I forgot to get the ribbon to use for handles, so I'll have to make a quick stop at the fabric store sometime this week to pick it up.

So far we have 4 participating in the UFO Sew Down! Feel free to join in and get your name in the hat for several cool prizes!

Monday, August 23, 2010

60* Tablerunners

I absolutely fell in love with my 4.5" double strip 60* ruler when I made the French Braid tablerunner for a class I'm teaching in October. I needed to make two wedding gifts for weddings I'm going to next weekend and I couldn't help but pull out my purple wedding scraps and make tablerunners using the 60* ruler. I cut out 8 WOF strips by 4.5" and then cut the 60* triangles. I had way too many cut out! I used a cream rock candy for the background and made these 8 rows instead of 12. I could have mixed up my colors a bit more, but in the interest of time I decided to follow a pattern. Saturday night I was able to finish up the first one I had started.
IMG_0344
I made a second one too. I mixed up the order of pieces a little different for this one.
IMG_0346
I put them together to see which one I like better and I think I like the second one better.
IMG_0348
Sunday afternoon it was 100+ outside, the first time in 3 years!  I stayed downstairs with the AC and started quilting the tablerunners. I did a loopy loop pattern on one for my co-worker. I also put the binding on and got it handsewn down during Big Brother last night.
IMG_0358
I added labels to both, using leftover triangles. I love how they turned out.
IMG_0361
The other one I did I meandered on it. I used a dark purple King Tut and Bottomline. I got the binding put on it too, but still have a bit of handsewing to do. This one is for a 2nd cousins wedding that I'm going to next weekend. I'm not sure how I lucked out that both weddings were purple and I still have a ton of scraps left over! Some day I will use all the purple scraps, but for now I am just loving that I could totally make both of these from my stash without buying anything. I have enough 60* triangles cut out to do another one, but I think I'll move on and work on some other projects first.
IMG_0363

Hold That Thought!

Last Tuesday, when my mom and great-aunt Mae came to visit, she wanted to see my quilt frame in action. She couldn't believe how big it was. I had two fat quarters ready to put on it and I was able to quickly quilt them up to show her how it worked. She was amazed and now understands how I can get so much done with so many machines and the frame. After she left, I cut out two squares and made "Hold That Thought" envelopes from The Teachers Pet pattern. The big one is the large size and the smaller one is the small size. I put binding on and did the hand work this week during breaks. I also folded and stitched them together. These are samples for the store from a Christmas line of fabric, but they would work in any fabric. It made a super quick project for practicing machine quilting.
IMG_0339
The small one holds a gift card and the larger one can hold a jelly roll. I used Fruitcake by Moda fat quarters. I love this line! Totally different Christmas colors, but oh so fun. I thought they would be tedious, but actually they whip together pretty fast and were fun to make.
IMG_0342
Aunt Mae's been quilting longer than anyone I've known, but she does all her quilting by hand, so very different than how I learned, but we still learn from each other. I'm so glad she was able to come out for a visit.

Thursday, June 03, 2010

Construction Baby quilts

Last night I was able to get back to my sewing room for some much needed relaxation! The handsewing of binding on the first construction baby quilt is done and the label is on it. It's been given away as well! Love how it turned out and I'm so glad I picked up the last 3 panels when they were super cheap. They make really quick and easy baby quilt gifts.
IMG_0214
I quilted the grader tablerunner for my dad last night too. I just did a little stipple all over it. It was done in 3 passes, so it's not real wide. I used the gray for the binding which really compliments it. Now I have some handwork to do again. This one is small, so it travels nicely.
IMG_0219
While I was at it, I squared up and trimmed the 2nd construction quilt panel. I put the blue binding on it too, so now I just need to do some handwork and it will be ready for a gift when needed.
IMG_0220
I was planning on working on the wedding quilt last night, but I just felt a lot better getting these couple of projects off my work table and now I can move on! The wedding quilt has the first border around each block and now I have to figure out how I'm going to put the quilt together with sashing.

Saturday, October 25, 2008

Moneik's Bias Binding Tutorial

When I first started quilting I made a scalloped edged table topper that required bias binding. At that time my mom taught me how to do bias binding, but I would only do it when she was around to help me. A year ago my brother got married and I needed (wanted) to do a bias binding on their wedding quilt so the strip would go diagonally on the binding, but mom wasn't around and it had to be done, so I did it myself and it turned out great. Now I've done bias binding a few times with her tried and true method and I don't mind it a bit.
Here's how mom and I make bias binding:
We use "The Quilter's Pocket Reference" An Easy Guide to Yardage and More by Peggy Schoolley. We refer to it as the Quilter's Bible because we use it so much. It's the little one with the turquoise cover. On page 24-25 it gives the size of square to make the amount you need. I needed 90" and I used a 2 1/2" binding, so my square was 16" I mark two x's on the top and two on the bottom as you see in the next two photos.

October 08 Quilts 002
October 08 Quilts 003
Cut the square diagonally from the upper left hand corner to bottom right.
October 08 Quilts 004

Then take the bottom piece and fold up to the top. The X's are now together on the inside, right sides together. Offset the bottom piece (now on top) by 1/4" to the right which allows for the seam allowance.
October 08 Quilts 005
I pin and then sew at a 1/4" to join the two pieces. I've marked where the X's are on the right sides, so you can which side to sew the 1/4" seam.
October 08 Quilts 007
Then press the seam to one side or open, which ever you prefer. On the longest side, I use the rotary cutter and cut every 2 1/2". In this case I marked the lines, so you can see where I'm cutting. I do have an inch left, but leave it for now. I don't cut to the end, just an inch or so from the end.
October 08 Quilts 008

October 08 Quilts 009
Here's my approximately 1/2 to 1" left uncut at the end.
October 08 Quilts 010
Here's all the binding cut and ready to sew. At this point, cut the extra piece off. (1" in my case"
October 08 Quilts 011
I then shift if to one side to match up with the next piece. If you are attaching to itself and just have loops, it's wrong. It has to be off set and will cause these twisted loops.
October 08 Quilts 012
At this point with the 1/4" seam sewn, you can see that there is about 2" to clip. At this point I either use a shears or rotary cutter to cut the little pieces.
October 08 Quilts 013


October 08 Quilts 014
I quick cut with the shears and my binding is done.
October 08 Quilts 015
Here's the binding. You can see how I layed it so you can see the stretch of the bias in it. There are two seams in it which are in a trapezoid shape. Not sure it you can see the seams, but they are there.
October 08 Quilts 016
Here's my 90" of bias binding.
October 08 Quilts 017
Here's the binding on the top and bottom of my new bag. I had just enough! It's always better to make more than you need! I love that you can use a fat quarter to get a lot of binding made.

October 08 Quilts 019
Hopefully someone will benefit from this tutorial. Let me know if you have any questions or want more clarification. Happy Bias Binding!

Monday, July 07, 2008

Binding... Moneik Style

I don't like hand work... never have, probably never will. So binding for me is done by machine. I used to use the burp method for all my quilts... even the king size flannel I made in college! I learned how to do binding from a lady named Ann I think. That was way back in college too... I've changed it a bit, but it's relatively the same way she taught me and my mom. Mom has been my other teacher for bias binding, but that's a whole other ball game.
I start with binding strips either 2 1/2" or 2 1/4" wide. I use the wider for when I sew the binding on the back and do a decorative stitch on the front to finish, but I use the narrower for when I sew to the front and pull around to the back. I think it's really personal preference.
To join binding strips I take one strip and lay it horizonal right side up. Then take the strip you want to join to it and lay it vertical at a 90 degree angle with right side down.
July Quilts 011
I usually use the salvages to figure out the 90 degrees, but a square also works.
July Quilts 012
With the two lined up, I mark a line from the upper left hand corner where the two pieces meet to the lower right hand corner. This is the sewing line. You can pin it to hold, but I usually just hold it and sew. I've also just winged the sewing line too, but to start a line helps to make sure it comes out even. If you need to put more than two strips together, take the other end of the face down piece and put it horizontal face up and add the next strip face down vertically and follow the same steps. I have found if I do it the exact same way all the time, I never mess up. Consistancy is key here. Always horizontal face up, vertical face down, adding strips to the right end.
July Quilts 013
Sew down the line you marked, directly on the line. I use my walking foot for all steps in this process as it helps all the layers stay together.
July Quilts 015
Then using the ruler, add a quarter inch seam allowance and cut off the corner. This would be to the right of your sewing line.
July Quilts 016
Then press the seams either way. I press to the right, as you can see in the picture the binding strip is upside down from the way I sewed, but I pressed it to the right.
July Quilts 017
Now you are ready to add the binding to the quilt. Fold the binding in half wrong sides together, evenly. I don't press this, but let it lay naturally. I leave 6 -12 inches of the binding free at the beginning. This will be the tail to meet up with at the end. Six for wall hangings, 12 for bigger quilts. More is easier, but you don't want too much or it will have too much give. My finger is pointing out where I will start sewing the binding to the front of the quilt. The piece to the left is my 6" tail.
July Quilts 018
Sew the binding on with a quarter inch or slightly less 1/4" seam allowance. I sew to 1/4" from the corner. I don't get out the ruler all the time, but I stop 1/4" from the corner, lift the needle, pull the thread out a tiny bit (maybe 1" at most) and turn the quilt.
July Quilts 020
When the quilt is turned, fold the binding strip at a 45 degree angle with the corner. The unfinished edge of the binding should be straight with the right edge quilt when it is folded like this. It's hard to see in the picture because the quilt is white, but on the bottom you can see the shadow where the quilt edge is.
July Quilts 021
Holding this fold in place, bring the binding strip straight back down, raw edges of binding, aligned with raw edge of quilt. This creates a little triangle of fabric in the corner as you can see in the picture. Start sewing a quarter inch from the edge and continue sewing the bind down, repeating all corners the same way.
July Quilts 022
When you reach the end where you will be matching the pieces, leave a gap 7-13" long. About an inch longer than the tail you left at the beginning. Back stitch to hold it in place and cut your thread.
July Quilts 023
Fold the original tail piece up ( it probably didn't stay in place while you were sewing) straight with the edge of the quilt. Then fold the end tail you just finished sewing over it. Make sure these are laying perfectly flat. I will even pull them away from the machine and do this on my table if it's easier. The end tail should be to left as you are working and the beginning tail should be on the right.
July Quilts 024 July Quilts 025
Using a scissors or snipper, cut a little less than 1/4" snip through all four layers of binding about 1" from the left end of the beginning tail. (Yes this is on the underside, but you should still be able to see it.) Make sure you have about 2 1/2" on both sides of the beginning and ending stitching. Sometimes this snip will be right in the middle.
July Quilts 026
Because it's too hard to see the snip in the pictures, I put a ruler down and drew a line so you could see where they are. Pull the top (or left or end piece of binding away and lay it flat, right side up. The second picture shows where the snips are in the binding.
July Quilts 027 July Quilts 028
Now fold the beginning tail (on the right side) will be place right side down and the end tail. Line up the left side of the beginning binding with the two notches on end tail. On the beginning tail, line up those notches with the top of end tail. In the picture below you can see where the notches are marked by the ruler edge.
July Quilts 029
Keeping these together, draw a line on the diagonal. In the picture below I marked the diagonal from upper left to lower right with the ruler (left side of ruler). The picture is taken at a funky angle, so it's kind of hard to see.
July Quilts 030
This picture shows the little blue water wash away line that I drew. Sew directly down the line, just like when you were joining the strips of binding.
July Quilts 032
Pull it flat to check that you have it right. I've had a few mishaps in the beginning of getting pieces twisted or not lined up right, so I always check that it will lay flat.
July Quilts 033
Then add a quarter inch seam and cut off the excess (this would be like the corner of the binding strips).
July Quilts 034
Press that little piece to one side or the other. The same direction you pressed all the other joints is good, just don't open the seam as it makes the binding weaker.
July Quilts 036
This is what the binding should look like when it is on the front. Then press the binding flat from the front out. This makes it easier to have it roll around to the back.
You'll have to excuse my ironing board men... it was the easiest spot to take pictures.
July Quilts 038 July Quilts 039
I use Steam - A-Seam 2 1/4" strips that come on rolls.
July Quilts 040
I press on the SAS2 on the back side right along the stitch line. Since I took a 1/4" seam, it fits perfectly there and unrolls as I need it. I leave the paper on and do all four sides.
July Quilts 042
I pull back the paper and fold up the binding around the edge. It holds in place while I fix the miter on the corner. I always fold the left side up first, then fold the right side in. The extra fabric from the front, folds up and in, forming a perfect mitered corner. Then I steam the binding down. I do a small section at a time.
July Quilts 043July Quilts 045July Quilts 046
This is what it looks like on the back when the binding is steamed in place.
July Quilts 047 July Quilts 048
I use my walking foot and position the needle right next to the binding on the front. I use a thread that matches the quilt, but not necessarily the binding. The bobbin should match the bindng though. I stitch in the ditch all the way around the binding on the front side. In the pictures you can see how closely I get, but don't actually go onto the binding.
July Quilts 049 July Quilts 050 July Quilts 051
This is the back side of the binding. For this tutorial I used 2 1/2" binding strips since it was a kit and that's what it came with. Normally I use 2 1/4" and the stitching is closer to the edge of the binding on the back. I also pin when i don't have SAS2. I pin from the front, make sure all the pins hit binding in the back and sew the same way. I'm just not a big pinner, so I like the SAS2.
July Quilts 052
I also do this method in reverse. I sew the binding to the back, flip around to the front and do a decorative stitch on the binding. With this method I do use a 2 1/2" strip of binding.
Hopefully this will help someone learn an easier way of making binding, or adding a little trick to make their own way of doing binding easier. Please let me know if something needs to be clarified or if you have questions. I'd like to make binding as easy as possible, so people aren't afraid to finish their quilts.